×
- Hello
- Login or Register
- Quick Links
- Live Chat
- Track Order
- Parts Availability
- RMA
- Help Center
- Contact Us
- Shop for
- BMW Parts
- BMW Accessories
My Garage
My Account
Cart
Genuine BMW 2500 Universal Joints
U - Joints- Select Vehicle by Model
- Select Vehicle by VIN
Select Vehicle by Model
orSeries
Model
Year
Select Vehicle by VIN
For the most accurate results, select vehicle by your VIN (Vehicle Identification Number).
3 Universal Joints found


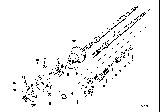
BMW 2500 Universal Joint
Part Number: 32311112359$74.43 MSRP: $87.30You Save: $12.87 (15%)Ships in 1-3 Business DaysBMW 2500 Universal Joint
Part Number: 32311112358$74.43 MSRP: $87.30You Save: $12.87 (15%)Ships in 1-3 Business Days
BMW 2500 Universal Joints
If you are looking for OEM BMW 2500 Universal Joints, we highly recommend to shop with us. Not only do we offer budget friendly prices, but we also provide fast delivery. In addition, we have a hassle-free return policy on all genuine BMW 2500 Universal Joints that come backed by the manufacturer's warranty.
BMW 2500 Universal Joints Parts Questions & Experts Answers
- Q: How do you renew the upper column bearing and the universal joints in a steering column on BMW 2500?A:In order to change the upper column bearing, it is necessary to unbolt the pad located in the middle of the steering wheel and deroute the wiring for the horn pushes. Make sure that the wheel is in the twelve o'clock position after that, you have to undo the nut found on the wheel and then pull the steering wheel off the shaft. Then, try to take off the edges illustrated in the following picture, then after that just take out the circlip as it is depicted in the picture below, also take out the coil spring and the ring. Screw the new upper bearing into place with the groove up, put on the ring with the shank facing the bearing, put on the spring and the washer. Place the circlip over the shaft splines and use the collar to press circlip down and the snap the collar off and place it in the right position. Check that the turn indicator switch is in the mid-position, fit the cancelling cam and confirm that the spacing is about 0.3mm; tweak if required. Align the steering wheel to be straight ahead, push it down on to the splines of the shaft, then engage the retaining nut, the terminals and reconnect the wiring, then finally refitting the column lower housing and the steering wheel central pad. To renew lower bearing of the column, pull the housing away from the steering column for access, disconnect the cable from rear fog lamp warning light switch and turn the housing to the right. Locate the universal joint coupling to the steering shaft, then unscrew the clamp bolt, take off the upper section of the housing with the instrument panel and pull the steering column up. Secure the upper section of the housing with only two screws, pull the steering wheel toward you to slide the circlip out and the collar with it, and plunge the bearing. Position the new bearing, place the collar, with the shank side towards the bearing, in position and secure in position with the circlip. Reinsert the other components in the same order, by using the marks that were made earlier for alignment. To get to the upper universal joint, the steering column housing should be removed, including the rear fog lamp warning light switch cable, and the housing should then be swung to the right. There is a clamp screw that has to be taken out, the stop nuts must be loosened and the upper part of the housing that is connected to the pedal pivot bracket has to be removed. Slide the tri-lobed universal joint off the steering shaft way from the joint disc without rotating the steering wheel or shaft to preserve the alignment. Inspect condition of plastic bush and replace if worn out, then fit new universal joint and replace all the other parts in backward sequence tightening the nut of the warning switch and reconnecting other wires. For renewing the lower universal joint, first, demount the housing I and disconnect the warning light switch; the steering gear should be straight ahead. After that, it will be necessary to unscrew the second clamp bolt and separate the upper section of the housing from the pedal pivot bracket Take the steering shaft out of the universal join. Loosen and take out the second clamp bolt and detach the universal joint from the steering gear where you should see marks on the steering gear shaft and marks on the housing. Make all new adjusting for the new universal joint then turn the second clamp bolt of the new universal, centralise the new steering wheel then joint the new shaft passing through the new universal then turn the first clamp bolt of the new universal it is correct to be engaged on the small side of the shaft grooves and the long yoke signal face the steering column. Screw the other remaining parts in the same manner in a backward manner with the warning switch wiring done in the aforementioned manner.
