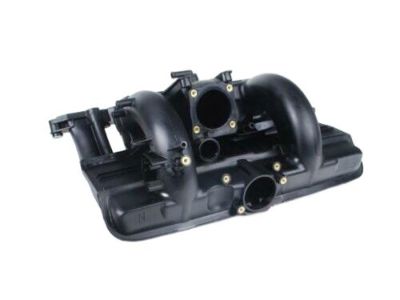
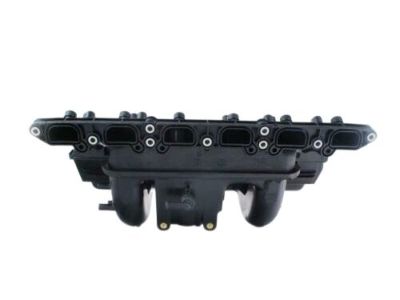
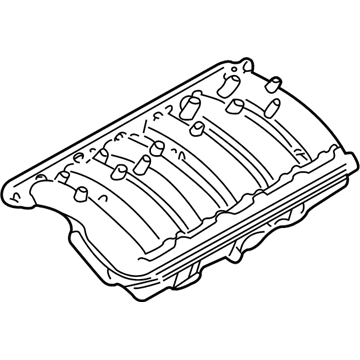
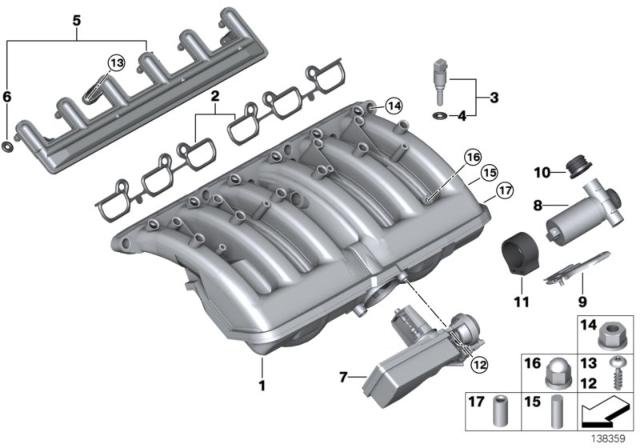
Spin the hood into the servicing position, and unscrew the negative terminal on the battery with every caution indicated under the battery disconnection wordings. Take off the air cleaner housing with fresh air ducts and the brace at the strut towers, and also the housing for the interior air quality improving microfilter. To remove the left partition wall it is necessary to remove the rubber seal from the upper part of the heater bulkhead, to unhook the vacuum line for the power brake booster with disconnecting it from the booster, and withdrawing it together with the electric wires. Unlock the plastic clips on top and rear, push slightly forward on the trim and then pull the partition wall up. After that, pull the engine design cover and, being over the engine, unscrew the B+ lead bracket, resonance valve electrical connector, oxygen sensor connectors, electrical connector for the intake air temperature sensor and manifold vacuum line, noting the position of the oxygen sensor connectors to facilitate reassembly. On the depression of the cylinder head, remove the engine vent hose from the cylinder head cover by using its spring clip and remove the electrical connector of VANOS solenoid. On the fuel injectors separate the wire lock clip in one corner with the help of a small screwdriver and then remove the two main harness hold-down and raise the whole harness. Below the intake manifold, unscrew the electrical connector at the fuel tank venting valve, unscrew the hose at the quick disconnect fitting and then pull of the valve from the manifold. Remove the electrical connector of the idle speed control valve and also remove the throttle housing. Remove the Schrader valve cap on the fuel rail, and using a wrench on the top of the Schrader valve, open them to release pressure, then, turn the cap of the fuel tank, blow compressed air back into the fuel tank for only 5 seconds. At the rear of manifold, insert the unlocking pin by using the special tool to release the locking clip fitted internally into the fuel line connection end of the fuel supply line from fuel rail. On the underside of the car, and also unbolt the left engine mounting bracket and remove the knock sensor connector behind the manifold base, then the four nuts between the manifold lower support and the intake manifold mounting nuts. Ease out the intake manifold from the cylinder head, plan for any electrical connection or hoses that may be in the way and if there are any, be careful not to trap them and make sure to block the open intake ports to avoid droppings into the engine. The removal process is just the reverse of installation while there are new fuel injector seals and the condition of the intake manifold gaskets must be examined before the installation as well, they must be replaced if worn. Check the rubber gasket at the throttle housing and the idle speed control valve and change, if necessary, clean and smear the O-ring at the MAF sensor and air filter housing with assembly fluid and correctly orientate the arrow on the throttle link harness connector and plug connectors before fully tightening.