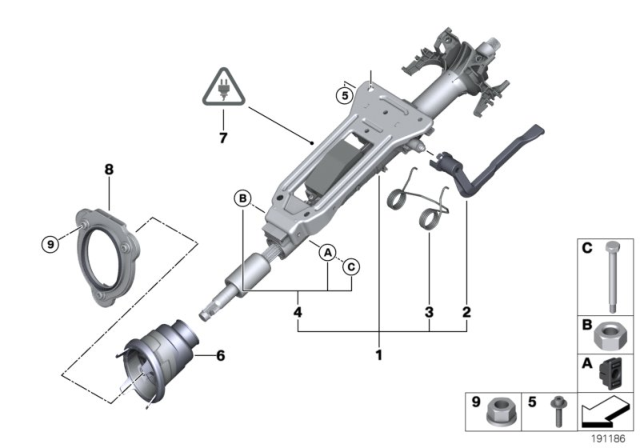
New steering column shear-bolts and an intermediate shaft clamp bolt/nut will be required upon installation. Start by disconnecting the negative battery cable. Then, remove the three Torx bolts and the driver's knee bolster panel below the steering wheel, disconnecting any electrical connectors as needed. Reach behind the instrument panel to pull down the driver's side footwell heating duct and release the wiring harness from it. Extend the steering wheel fully, set it to the lowest position, and remove it. Using a blunt, flat-bladed tool, pry the column upper cover from the lower one. With the column at its highest position, press the retaining clips on each side and pull down the lower column cover. Disconnect electrical connectors from the column switches and release the harness from its retaining clips on the column. Slide up the rubber boot at the base of the column, remove the clamp bolt from the shaft and discard it. Then, remove the four column mounting bolts/nuts, pulling the column to the rear. Before reinstalling, inspect the column for safety features, potential damages, and check for freeplay in the column bushings. Any overhaul needed should be done by a BMW dealer. When installing, position the column and align it with the intermediate shaft splines. Secure it using the mounting bolts, reconnect electrical connectors, and ensure wiring is properly routed. Align the intermediate shaft with column marks, insert the column into the shaft, and secure with the new clamp bolt. Reattach the rubber boot, steering column covers, and steering wheel. Finally, reposition the footwell air duct, reconnect the negative battery cable, and if a new column has been placed, recalibrate the steering angle sensor using BMW diagnostic tools, preferably through a qualified dealer or shop.
Posted by BMWPartsDeal Specialist 


