Contact Us Live Chat or 1-888-580-1680
My Garage
My Account
Cart
Make sure this part fits

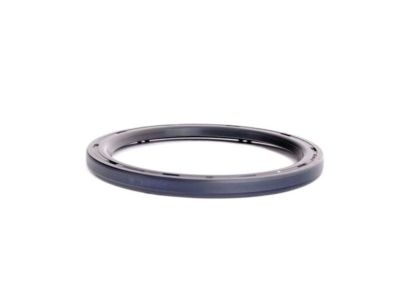
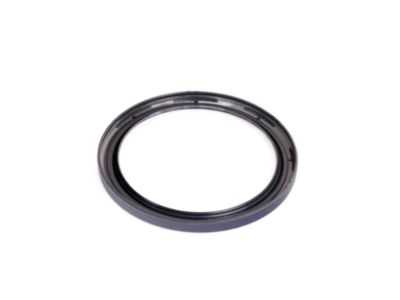
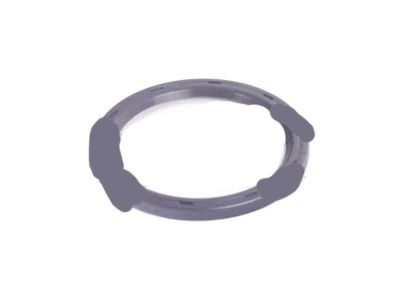
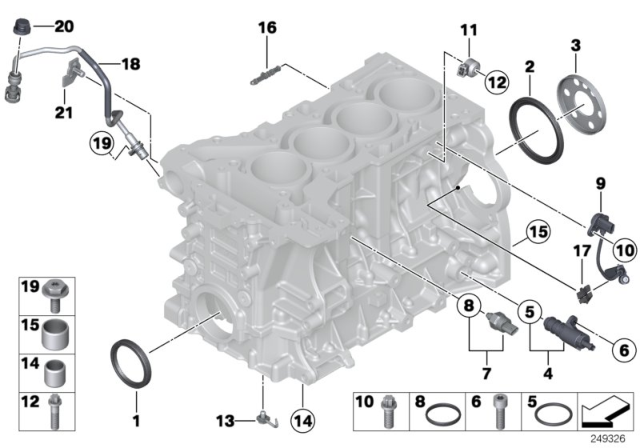
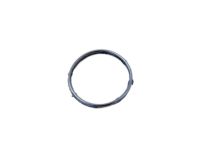
BMW 11117587168 Shaft Seal

2006-2021 BMW 11-11-7-587-168

Customer Questions & Expert Answers (15)
BMW 11117587168 Shaft Seal
  • Part Description
    Shaft seal
  • Manufacturer
    BMW
Make sure this part fits
$34.46 MSRP: $56.58
You Save: $22.12 (40%)
Ships in 1-2 Business Days
1
ADD TO CART
  • Related Parts
  • Product Specifications
  • Vehicle Fitment
  • Customer Questions & Expert Answers
  • Product Specifications

    BrandGenuine BMW
    Manufacturer Part Number11117587168
    Part DescriptionShaft seal
    Item Weight0.50 Pounds
    ConditionNew
    Fitment TypeDirect Replacement
    ManufacturerBMW
    SKU11117587168
    WarrantyThis genuine BMW part is guaranteed by BMW's factory warranty.
    Shipping & ReturnShipping Policy Return Policy
    Warning: California’s Proposition 65
  • Vehicle Fitment

    Year Make Model Submodel
    2011 BMW 1 Series MCoupe(E82)
    2008-2013 BMW 128iConvertible N51 Engine(E88), Convertible N52 Engine(E88), Coupe N51 Engine(E82), Coupe N52 Engine(E82)
    2008-2013 BMW 135iConvertible N54 Engine(E88), Convertible N55 Engine(E88), Convertible(E88), Coupe N54 Engine(E82), Coupe N55 Engine(E82), Coupe(E82)
    2014-2016 BMW 228iConvertible N20 Engine(F23), Convertible N26 Engine(F23), Coupe N20 Engine(F22), Coupe N26 Engine(F22), N20 Engine(F22), N26 Engine(F22)
    2015-2016 BMW 228i xDriveConvertible N20 Engine(F23), Convertible N26 Engine(F23), Coupe N20 Engine(F22), Coupe N26 Engine(F22)
    2013-2018 BMW 320iSedan(F30)
    2013-2018 BMW 320i xDriveSedan(F30)
    2006-2011 BMW 323iSedan(E90)
    2006 BMW 325iSedan(E90)
    2006 BMW 325xiSedan(E90), Wagon(E91)
    View More
  • Customer Questions & Expert Answers

    Q:
    Does PN fit the VIN? Posted by BMWPartsDeal Specialist
    A:
    You can Select Your Vehicle to check if 11117587168 fits your vehicle.
    Posted by BMWPartsDeal Specialist
    Q:
    How to replace the crankshaft front and rear oil seals in 3.0L six cylinder engine on BMW 325i? Posted by Customer
    A:
    To change the crankshaft front oil seal, detach the crankshaft vibration damper. To replace the crankshaft rear oil seal, remove the flywheel/driveplate. While the flywheel/driveplate is off, this would be an ideal time to check on your vehicle's manual transmission clutch. Carefully pry out the oil seal from within a cylinder block using a flat-bladed screwdriver or a similar tool. Try as much as possible not to destroy either side of where you have placed it on your engine. Alternatively, drill two tiny opposing holes in the hard outer surface of the sealant, insert two self-tapping screws and use pliers to pull out this particular type of filler material. Before applying any lubrication between crank shaft hub and cylinder block surfaces make sure that they are cleaned up very well with clean engine oil solution. Genuine BMW seal kits come with a guide sleeve pre-fitted into the seals using Loctite sealing compound and primer at place. Set seal and guide sleeve onto crankshaft hub such that slots located at external periphery of sealer are aligned with junction in cylinder block. Apply Loctite primer supplied to both slots on outer sur-face of sealer using brush provided for that purpose only. Make sure you leave it for at least one minute before proceeding forward because most times you may find yourself running after some little mistakes which could have been avoided if enough time was given for drying process. Use right size socket or pipe to push in new oil seal squarely as possible until it becomes flush with its outer edge only then should you stop hammering; also force some Loctite primer into slot on each side of lip by means of brush supplied; inject additional loctite sealing compound by way of kit syringe into slot on each side of lip finally apply some more primer over coating sealing compound. Afterwards fit back crank shaft vibration damper or fly wheel drive plate assembly again return sequence.
    Posted by BMWPartsDeal Specialist
    Q:
    How do you replace the front crankshaft seal to prevent oil leaks in N51,N52,N52KP,N54 six cylinder engine on BMW 335i? Posted by Customer
    A:
    The Lycoming realised that when replacing the crankshaft seal, the grooves and crankcase seams must be covered with a special Loctite ® seal to stop the oil leakage; one must also read the entire procedure before performing the work. First secure the vehicle and locate the splash shield under the engine and remove them as well as the engine accessory belt and the vibration aka front pulley. It is very important not to move the vibration damper hub bolt in a way that results in the loosening to enable the timing chain drive sprocket to rotate thereby causing the valves to be damaged. Engage BMW special tool 11 9 221 with the vibration damper hub and fasten it to tighten the bolts from BMW special tool 11 9 224 to make the crankshaft seal slightly Spring inward about 1mm for ease of removal. Following the removal of the special tools, insert screw BMW special tool 11 0 371 into the crankshaft seal, and tighten with an approximate torque of 80 Nm (59 ft-lb); where necessary, rotate the screw clockwise to extract the seal. Cautiously saw the seal at the dash line and remove the tool. Replace the seal in its seating on the crankshaft and also clean the area round the crankcase seam before degreasing it, while lightly oiling the sealing area on the hub of the vibration damper. Insert screws from BMW special tool 11 9 234, and screw on BMW special tool 11 9 232 to the vibration damper hub so that the crankshaft seal and the installation sleeve are located over the crankcase opening with the grooves aligned on the crankcase seam. Apply Loctite® 171000 (primer) on the both grooves of the seal and let it to dry for as much as 1 minute or until fully dry. It is advisable to use BMW special tools: 11 9 231 and 11 9 233 to instal the seal, and after that treat the seal grooves and the crankcase seams with Primer Loctite® 171000 and filling the groove with Sealant Loctite® 128357 using injector kit if necessary. Last but not the least, apply Loctite® 171000 (primer) on the sealed places to fix the sealant and finally reattach the crankshaft vibration damper, rest of the procedure is same as the disassembling one.
    Posted by BMWPartsDeal Specialist
    Q:
    How should the new oil seal be installed for the 2006 BMW 325i? Posted by Customer
    A:
    The oil seal should be driven into place as squarely as possible using a seal driver, a suitable socket, or a piece of pipe of the appropriate diameter until its outer edge is flush.
    Posted by BMWPartsDeal Specialist
    Q:
    What should be done before installing the new oil seal for the 2011 BMW 328i? Posted by Customer
    A:
    The sealing surfaces of the crankshaft and cylinder block should be thoroughly cleaned, and a light coating of clean engine oil should be applied to the sealing surface of the crankshaft.
    Posted by BMWPartsDeal Specialist
    Q:
    How is the new radial shaft seal positioned for the 2009 BMW 335i? Posted by Customer
    A:
    Position the new radial shaft seal on special tool 11 8 220 and push it over until flush with the crankcase before removing the tool.
    Posted by BMWPartsDeal Specialist
    Q:
    What tool or method can be used to carefully remove the old oil seal for the 2006 BMW 330i? Posted by Customer
    A:
    Carefully pry the oil seal from the cylinder block using a flat-bladed screwdriver or similar tool. Alternatively, drill 2 small holes opposite each other in the hard outer surface of the seal, insert 2 self-tapping screws, and use a pair of pliers to pull the seal out.
    Posted by BMWPartsDeal Specialist
    See expert answers on similar Crankshaft Seal
    Q:
    What are the initial steps to begin the replacement process for the 2010 BMW 335i? Posted by Customer
    A:
    Begin by removing the transmission, followed by the clutch pressure plate and disc for manual transmission vehicles, and then the flywheel. Drain the engine oil, and if necessary, scrape off the rubber coating to expose the six removal openings on the crankshaft rear main seal.
    Posted by BMWPartsDeal Specialist
    Q:
    How should the new oil seal be installed for the 2006 BMW 330i? Posted by Customer
    A:
    The oil seal should be driven into place as squarely as possible using a seal driver, a suitable socket, or a piece of pipe of the appropriate diameter until its outer edge is flush.
    Posted by BMWPartsDeal Specialist
    Q:
    Why is it important not to loosen the vibration damper hub bolt for the 2009 BMW 335i? Posted by Customer
    A:
    Loosening the vibration damper hub bolt could allow the timing chain drive sprocket to rotate freely, leading to valve damage.
    Posted by BMWPartsDeal Specialist
    Q:
    What is the remaining assembly process for the 2008 BMW X3? Posted by Customer
    A:
    The remaining assembly is the reverse of the disassembly, including installing the flywheel, clutch or torque converter, and transmission.
    Posted by BMWPartsDeal Specialist
    Q:
    How should the new oil seal be positioned on the crankshaft hub for the 2010 BMW 328i? Posted by Customer
    A:
    Position the seal and guide sleeve on the crankshaft hub, aligning the slots in the outer circumference of the seal with the joint in the cylinder block.
    Posted by BMWPartsDeal Specialist
    See expert answers on similar Crankshaft Seal
    Q:
    Why should the vibration damper hub bolt not be removed for the 2010 BMW X3? Posted by Customer
    A:
    The vibration damper hub bolt should not be removed to avoid valve damage.
    Posted by BMWPartsDeal Specialist
    Q:
    How is the new seal installed for the 2009 BMW X3? Posted by Customer
    A:
    The new seal and installation sleeve are placed against the crankcase opening, ensuring not to kink or damage the sealing lip. BMW special tools are used to fit the crankshaft flange, and a spacer ring is placed over the seal. The seal is pressed in using BMW special tools, and then the special tools and spacer ring are removed.
    Posted by BMWPartsDeal Specialist
    Q:
    What special tool is needed to remove the oil seal from the cover for the 2010 BMW X3? Posted by Customer
    A:
    BMW special tool 11 2 380, which is an oil seal puller, is needed.
    Posted by BMWPartsDeal Specialist
    See expert answers on similar Crankshaft Seal
    If you have any questions about this product, please don't hesitate to ask us. We will be happy to help you!

Genuine BMW Part 11117587168, the Right Choice

To ensure reliability, purchase BMW part # 11117587168 Shaft Seal. It is sometimes referred to as BMW Crankshaft Seal. Genuine parts are first-rate in terms of quality and functionality. Manufactured directly by BMW, they undergo rigorous testing and are made from dependable materials to ensure long-lasting durability and dependability. This part fits 2007-2016 BMW 328i, 2015-2018 BMW M3, 2007-2017 BMW X3, 2007-2018 BMW X5.

BMWPartsDeal.com is a leading supplier of genuine BMW parts and accessories such as BMW 11-11-7-587-168 Shaft Seal. In need of brand new OEM BMW parts? Feel free to browse through our extensive catalog of genuine BMW parts, all priced at the most competitive rates in the market. Furthermore, every part comes with a manufacturer's warranty and a hassle-free return policy for your convenience.

Why choose BMW Parts Deal

  • Dedicated Service

    Your complete satisfaction is our #1 goal

  • Lowest Prices

    Best deals on genuine OE parts from dealerships

  • Fast Delivery

    Orders are processed and delivered promptly