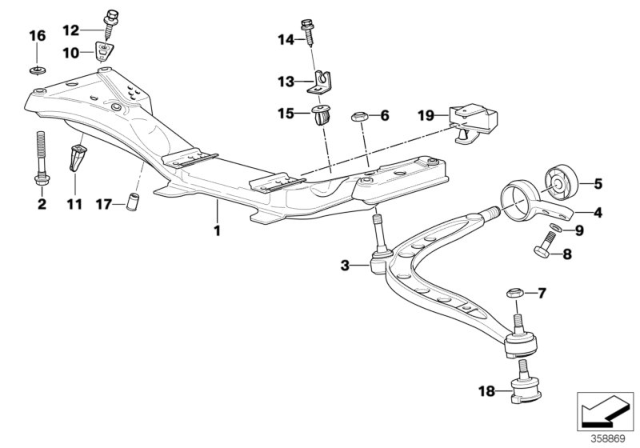
REMOVAL & INSTALLATION for E30 Models involves raising and supporting the vehicle, removing the front tire, and using wire to secure the strut. Disconnect the rear control arm bushing bracket, remove the nut and disconnect the link on the front stabilizer bar, unscrew the nut attaching the control arm to the crossmember, and press off the ball joint using the appropriate tool. During installation, ensure clean ball joint studs and bores, replace original nuts with new ones, and tighten according to specified measurements. Reattach the control arm bushing bracket, stabilizer bar link, and install the wheel and tire assembly before lowering the vehicle. For E36 Models, start by loosening the lug bolts, raise the vehicle, and remove the front tire. Disconnect the rear control arm bushing bracket, remove the front stabilizer bar bracket locknut, and secure the steering knuckle using wire. Remove and unscrew specific parts as detailed, and follow specified tightening measurements during installation. If the tapered ball joint spindles rotate, use specific methods to seat the spindle. Reattach the wheel and tire assembly, lower the vehicle, and check alignment. For CONTROL ARM BUSHING REPLACEMENT in E30 Models, the bushings must be pressed out, and BMW bushings are notably difficult to remove. A high-capacity hydraulic press, lubricant, and proper mandrels should be used, with bushing orientation marked for correct replacement. For E36 Models, remove the control arm, measure specific distances, mark control arm parts for reference, press off the old bushing, duplicate markings, and follow specific pressing and installation procedures. After installing the control arm, ensure the vehicle is weighted correctly for a set period, allowing any used agent to evaporate. Finally, test drive and check alignment, making adjustments as needed.
Posted by BMWPartsDeal Specialist 


