×
- Live Chat
- 1-888-580-1680

My Garage
My Account
Cart
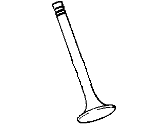
Genuine BMW 2500 Exhaust Valve
Exhaust Muffler Valve- Select Vehicle by Model
- Select Vehicle by VIN
Select Vehicle by Model
orSeries
Model
Year
Select Vehicle by VIN
For the most accurate results, select vehicle by your VIN (Vehicle Identification Number).
1 Exhaust Valve found
BMW 2500 Exhaust Valve
Part Number: 11341250129$85.27 MSRP: $103.16You Save: $17.89 (18%)Ships in 1-3 Business Days
BMW 2500 Exhaust Valve
If you are looking for OEM BMW 2500 Exhaust Valve, we highly recommend to shop with us. Not only do we offer the most budget friendly prices, but we also provide fast delivery. In addition, we have a hassle-free return policy on all genuine BMW 2500 Exhaust Valve that come backed by the manufacturer's warranty.
BMW 2500 Exhaust Valve Parts Questions & Experts Answers
- Q: Why is the correct adjustment of valve clearances crucial for engine timing and performance on BMW 2500?A: It is especially important to make the correct adjustment of the valve clearances as those have a direct effect on the overall timing and performance of the engine. If done to an extreme, clearance can cause a decrease in the amount of valve lift and the time that the valve is open, therefore decreasing engine performance, premature wearing of valve gear parts, and noise. Conversely, lack of or no clearance may also upset the engine timing, as well as the valve will not seat tightly, resulting to lost pressure and possible damage to valves and anniversary of their seats. Valve clearances should be checked at the intervals given by the manufacturer and every time the Cylinder Head is worked on during the servicing routine. Changes have to be made with the engine running so that it attains coolant temperatures of not more than 35 degrees C (95 degrees F). The correct clearances under these conditions are as follows: Inlet and exhaust valve clearances 0.25 to 0.30mm (0.010 to 0.012in). First of all you will have to take off the rocker cover and rotate the engine with help of tool number 7008-1 which has to be placed around the Timing Chain above the camshaft sprocket. If this tool is not available there are other ways to turn the engine: pushing the car in the top gear (if the car has a manual transmission), tugging on the alternator drive belt, or using a spanner on the crankshaft pulley nut, and the engine will be easier to turn if one removes the spark plugs first. Rev up the engine so that the valves for the No 6 (rear) cylinder are right off, or are touching the head plane, both inlet and exhaust, to a similar degree from the rockers. In this position the piston No 1 (front) cylinder will be at TDC on the compression stroke with both inlet & exhaust valves of the cylinder concerned in position for checking & adjustment of clearances. The engine should be turned with an interval of ranges with an aim of ensuring that the valves for the cylinder Nos 6, 2, 4, 1, 5 and 3 are in overlap positions with a view of facilitating checks and or adjustments. To measure the clearance between the adjustment mechanism and valve stem, the feeler gauges must be used; there is no need in adjustment if the clearances are within the parameters mentioned. If alignments of any sort are called for, loosen the locknut in the same way and align an appropriate rod or similar tool along the needed eccentricity. A feeler of the correct thickness should be easily inserted in the gap without much resistance or on the other extreme require a considerable force to be inserted. After proper clearance is attained, one should adjust the locknut and again measure the clearance. Repeat the same for the opposite valve of the cylinder in question before moving to the next pair of valves following the sequence set above. Lastly, replace the rocker cover with a new gasket if the previous one is beyond use or else if it has not been damaged: torque the rocker cover fixing bolts in sequence.


